- Welcome
- Home
- Tasks
- Documents
- Service Desk
- Chat
- Organizations
- Contacts
- Board
- Team
- Products
- Accounting
- E-Bank
- Search
- Calendar
- Managing Calendars
- Administration
- CalDAV
- Managing Events
- Event Settings
- Import
- Permissions
- Reports
- Calendar Types
- Representation of Events
- Viewing Events
- Events Widget
- Telephony
- Administration
- Projects
Managing Calendars
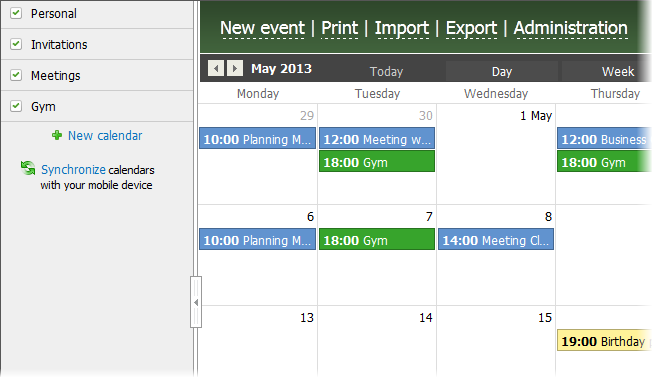
You can manage your calendar using commands that are located in the left part of the module:

Only a user with the "Administration" permission for either the entire module or the specific calendar can edit or delete calendars of other users (except the one created for each user on default). |
Commands for managing calendars:
- To create a new calendar, click
 Add a calendar. After that a window with Calendar settings will open.
 - To change the calendar settings, click the
 button that appears when the mouse cursor hovers over the calendar. This will also open the settings window.
 - To delete a calendar, click
 button that appears when the mouse cursor hovers over the calendar.
 - To display events in a calendar, put a check mark
 against it. If a calendar is not checked, its events are not displayed.
- To view events of a selected calendar only, hover the mouse cursor over the line with the calendar name and click
 . To get back to viewing all calendars click on the
  button that appears instead.
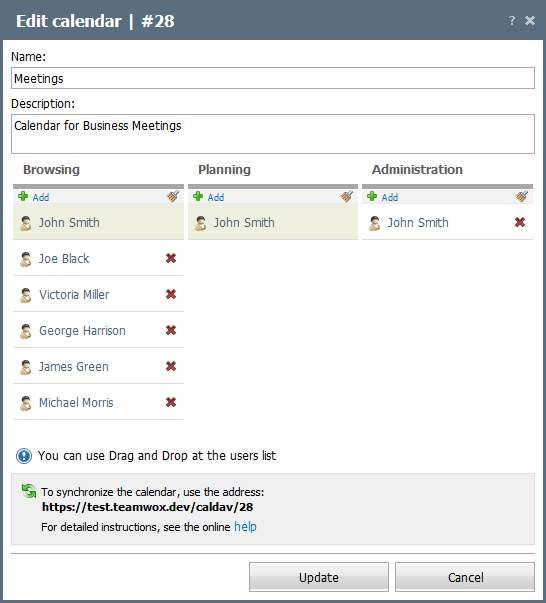
Calendar Configuration

The following settings are available in this window:
- Name — name of the calendar.
- Description — description of the calendar.
Below that, access rights for the calendar are configured:
- Browsing — this right allows users to view events in the calendar without an ability to create new events.
- Planning — this right allows users to view and modify events in the calendar. Without this permission, a user will be able to view events only if he or she is invited to attend it (displayed in the Invitations scetion).
- Administration — this right allows users to change calendar settings and delete it. With this permission a user is automatically given the "Planning" right.
To assign or delete users/groups from the permissions list, use buttons ![]() Add and
Add and  . A mouse click on
![]() Add will open a dialog with commands for assigning users, which is described in topic "Welcome -> List of Assigned Users". To clear the list of assigned user, click
Add will open a dialog with commands for assigning users, which is described in topic "Welcome -> List of Assigned Users". To clear the list of assigned user, click  . If you need to delete only one user/group from the list, click the
 button located to the right of each selected user/group.